Flow Configuration
Choose how users verify their identity in your project
Use the Flow Configuration tab in project settings to decide how users verify their identity. The visual editor shows the authentication flow as an interactive diagram, so you can click each step, adjust its settings, and review how the path changes before saving.
Changes take effect when you click Save and apply to both signup and signin flows.
The screenshot below shows the Flow Configuration editor in project settings, where each step of the authentication flow can be selected and adjusted before saving.
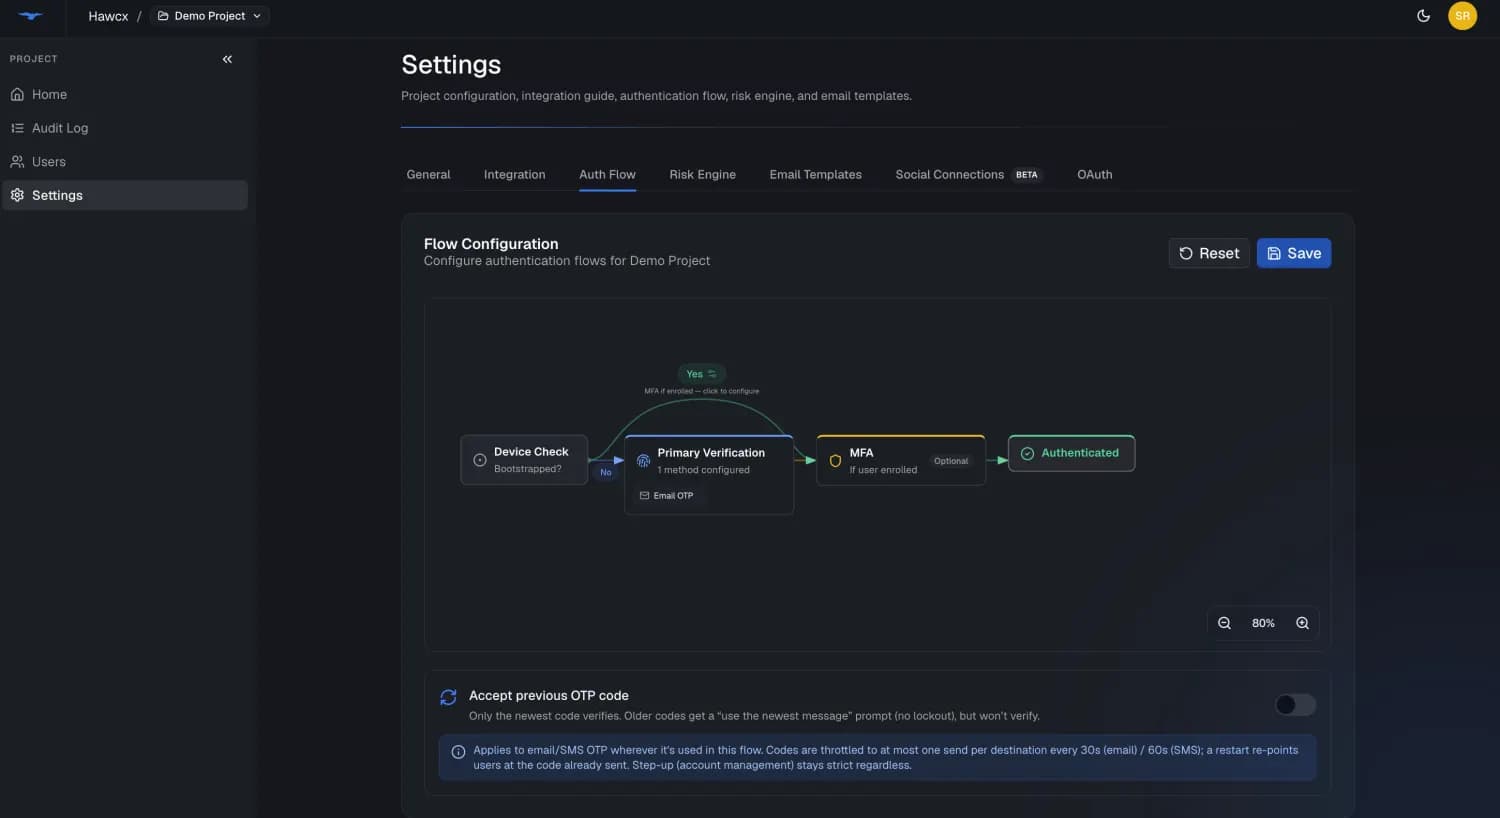
The flow follows four stages: a device check determines whether the user is on a recognized device, then primary verification confirms their identity, followed by an optional MFA step, before reaching authenticated status. Users on a bootstrapped device can skip ahead based on your configuration.
Configurable phases
Each flow has three configurable phases:
| Phase | What it does |
|---|---|
| 1. Primary | How users verify their identity (required) |
| 2. MFA | Optional second factor for extra security |
| 3. Device Trust | Remember this device for faster future logins |
Primary verification
Choose one or more methods users can use to prove their identity. At least one method is required.
| Method | Description |
|---|---|
| Email OTP | 6-digit code sent via email |
| SMS OTP | 6-digit code sent via SMS |
| Magic Link | One-click email link |
Multi-factor authentication
Add a second layer of security after primary verification. Set the MFA Policy to control when MFA runs:
| Policy | What it means |
|---|---|
| Off | MFA never runs |
| Optional | MFA runs only if the user has already set up an MFA method |
| Required | All users must complete MFA — at least one MFA method must be selected |
When MFA is Optional or Required, choose which methods are available:
| Method | Description |
|---|---|
| Email OTP | 6-digit code via email |
| SMS OTP | 6-digit code via SMS |
| TOTP | Authenticator app code |
| QR Code | Scan to authenticate |
| Push | One-tap approval |
Device trust
Hawcx uses zero-knowledge proof (ZKP) based device enrollment to bootstrap trust with a user's device. Once a device is bootstrapped, returning users get a faster login experience.
How device bootstrapping works
- User completes primary authentication on a new device
- The SDK generates a cryptographic key pair on the device
- The device is registered with the server using a zero-knowledge proof
Bootstrapped device benefits
When a user returns on a bootstrapped device, you can skip steps to speed up login. Turn on Skip MFA on bootstrapped device (on by default) so a second factor isn't required on devices the user has already enrolled — in the flow editor, click the Yes pill on the bypass path to toggle it.
The diagram updates in real time: with skip-MFA enabled (or MFA disabled), a bootstrapped device goes straight to Authenticated; otherwise it skips primary auth but still completes MFA.
The Risk Engine can still require MFA
Skip-MFA only speeds up low-risk logins. Even on a bootstrapped device, the Risk Engine can still force MFA when a sign-in trips a risk signal — for example impossible travel or too many attempts. Device trust does not override a risk-triggered challenge.
Last updated on